Please visit and like my new facebook page
Georgia Home Garden.
I wanted to post some information about my condition. My
surgery and treatment has been through the Emory Eye Center and tonight
I was checking out their website.
I have become quite
an expert of the eye, and I will admit I am a geek when it comes to
information. However, I still want to share this information because it
might help save someones vision in the future.
I can't say enough about the level of care that the Emory Eye Center has given me. I am thankful and fortunate that I only live a few hours from it.
This link shows how retinal tears form, which can lead to detachment as in my case.
http://www.eyecenter.emory.edu/clinical_specialties/av/retinal-tear.htm
This link is a computer animation of what I experienced, retinal detachment.
http://www.eyecenter.emory.edu/clinical_specialties/av/retinal-detachment.htm
Emory Eye Center Website for Retina Surgery and Diseases
http://www.eyecenter.emory.edu/clinical_specialties/vitreoretinal_disease.htm
Video on the history of Vitreoretinal surgey
http://www.youtube.com/watch?v=9iyquDGBg1o&feature=player_embedded
My Surgeon
http://www.eyecenter.emory.edu/faculty/bergstrom.htm
Thursday, October 10, 2013
Update on my eye and my retinal detachment
Please visit and like my new facebook page
Georgia Home Garden.
It has been three weeks since my surgery and I had another follow up appointment at Emory this morning. Overall the results were very positive, and here are the highlights:
Thank you again for all your prayers and support. The prayers and positive thinking have no doubt helped my eye heal. I am not out of the woods yet, but well on my way to getting back on track.
God bless
It has been three weeks since my surgery and I had another follow up appointment at Emory this morning. Overall the results were very positive, and here are the highlights:
- The pocket of fluid in my retina is still there, but it has improved since my last visit. The doctor was very pleased with what he saw and thinks over time it will all drain away.
- In a few more weeks I can go to my regular eye doctor and get my vision checked in my left eye. It will be a while before my vision in my left eye stabilizes, but the eye doctor can check it and get me a temporary contact. This will help in the short term so I can use both eyes.
- My next appointment is in two months on December 5th. They are going to assess my left eye, and also perform laser surgery on my right eye. I have two holes in my retina on that eye, and the laser surgery is going to seal those holes to prevent my right retina from detaching in the future.
Thank you again for all your prayers and support. The prayers and positive thinking have no doubt helped my eye heal. I am not out of the woods yet, but well on my way to getting back on track.
God bless
Wednesday, September 25, 2013
Update on me and your prayers are needed
Please visit and like my new facebook page
Georgia Home Garden.
I can't type much because I should not even be on the computer. Life has thrown another curve ball at me and I am trying my best to adjust. I had a retina detachment in my left eye. It has been one week since my surgery and I am trying to cope with the stress and strain of the situation. I will save the details on what that is, but just google it and you will quickly find what a scary situation it is to find yourself in.
I plan to post more about what happened and give updates as things progress. I have at least a few months of recovery before I will know how my vision will be.
Please pray for me and my family during this time.
This scripture is helping me get through.
Philippians 4:6-7
New Living Translation (NLT)
6 Don’t worry about anything; instead, pray about everything. Tell God what you need, and thank him for all he has done. 7 Then
you will experience God’s peace, which exceeds anything we can
understand. His peace will guard your hearts and minds as you live in
Christ Jesus.
Monday, August 5, 2013
Garden Harvests - August 5, 2013
Please visit and like my new facebook page
Georgia Home Garden.
This past week was exciting because I harvested my first potatoes that I have ever grown. I have always wanted to grow them, but this year I actually planted some Kennebec white potatoes in my coca cola cooler planter box. I harvested about 7 pounds and the potatoes were decent size.
We have eaten them all week, and they taste so good. I made home made french fries, potato chips, and garlic mash potatoes. I am considering replanting them for a fall harvest.
Freshly dug potatoes

Almost 7 lbs

Here they are all clean and ready to go.

Nice pepper harvest this week too.

A few more tomatoes

Tuesday, July 23, 2013
Garden Harvests - July 23, 2013
Please visit and like my new facebook page
Georgia Home Garden.
I am still around even though I haven't been blogging. My garden is not gonna be much this year, partly due to my neglect, but partly because of rain. It rains every day it seems. While the last two years were so dry, this year has more than made up for it. This one post shows all my harvests for the whole year. There will be more to come, but it won't be much.
So far this year, I have a grand total of 10 pounds of harvests, and here they are.
Habanero Peppers

Batch of tomatoes, I have had a few more but not many.

Hungarian Wax Peppers

Bell Peppers

Yellow squash


Monday, June 3, 2013
Garden Update - June 3, 2013 - The Good, The Bad, The Ugly
Please visit and like my new facebook page
Georgia Home Garden.
I knew this year was going to mean a smaller garden and a year of rebuilding, but boy I sure do miss my other garden. It is clear that the process of creating a quality garden soil from scratch really worked better than I realized. This year I had to resort to the one size fits all approach of getting soil from a sand and gravel yard. It was decent soil, but it is clearly inferior to what I had before. It is also clear that I won't be blogging as regular as before. I am averaging about once a month, and I would like to post at least once a week. Maybe if I start getting harvests, that will motivate me to post.
Do I have a garden...yes.
Will I harvest anything from it....we will see.
Let's start with the one bright spot, the Kennebec potatoes in my coca cola cooler. I have been adding soil as they have grown and this is how big they were two weeks ago.

Look at these things, I swear they grow a foot a day. I can't wait to see if get some good potatoes.

I have my first tomato baby of the season.

Here are the 12 tomato plants. They are growing, but they aren't as robust as last years.

Now some of the ugly, here are my squash and zucchini bed. Plants are small and weak.

Out of 12 plants, I have only one zucchini.

The bees aren't doing their job of pollinating the flowers and they are just dropping off.

Here is my pepper bed, you can see my new fence in background. I have stained the entire outside of it and I think it looks good. Now I have to do the inside.

Hungarian Wax Pepper

Yellow Bell Pepper

Habanero blossom

Picture of entire garden.

Sunday, May 5, 2013
Garden Update - May 5, 2013
Please visit and like my new facebook page
Georgia Home Garden.
It's May 5th and this is my first garden update for the whole year. This year is going to be a rebuilding year and my garden will be smaller than previous years. Moving to a new house and having to get a garden going on top of all my other projects has been a bit overwhelming.
I will try and give the reader's digest version on what I have been doing since January. I said I wasn't going to start plants from seeds this year because of time. Well, that went out the window and I started tomatoes, peppers, and eggplants from seed. I decided to set my beds up in "L" configurations to conserve space. I filled the six beds with a garden soil mix from a sand and gravel yard. I didn't take time to amend the soil, I just went with their mix so I hope it works. After filling the beds, I have been planting for the past three weeks. I hope to post regular garden updates now that I am off and running.
Here is an overall picture of the new garden, you can see the three "L" shapes I created. You can the layout of these same beds at my old house here. I kind of like this new configuration, it saves space and I still have plenty of room to reach into beds.

Bed Number 1 - Nothing but tomatoes here. I have a total of 12 tomatoes this year which is double the amount I planted last year. I have the same combination of Better Boys, Best Boys, and Roma tomatoes. I have the bed all covered in plastic and caged up. This should be a tomato forest in a few month months.

Bed Number 2 - Eight yellow squash plants in the background, and four zucchini in the foreground. I plan to harvest these hard until the borers get them in a few months and then plant something else in July, corn maybe.

Bed Number 3 - This bed contains peppers, eggplants, and lettuce. I have planted 4 jalapenos, 3 Hungarian wax peppers, 2 habanero peppers, 2 yellow bell peppers. They haven't sprouted yet, but I have planted lettuce and romaine as well. I still have two slots in the top right corner that need to be planted with something. Ideas anyone?

Close up of tomato plant. They have started to take off and the stems are getting thick.

Close up of squash plant, something eating the leaves.

Wednesday, May 1, 2013
Coca Cola Cooler Potato Planter
Please visit and like my new facebook page
Georgia Home Garden.
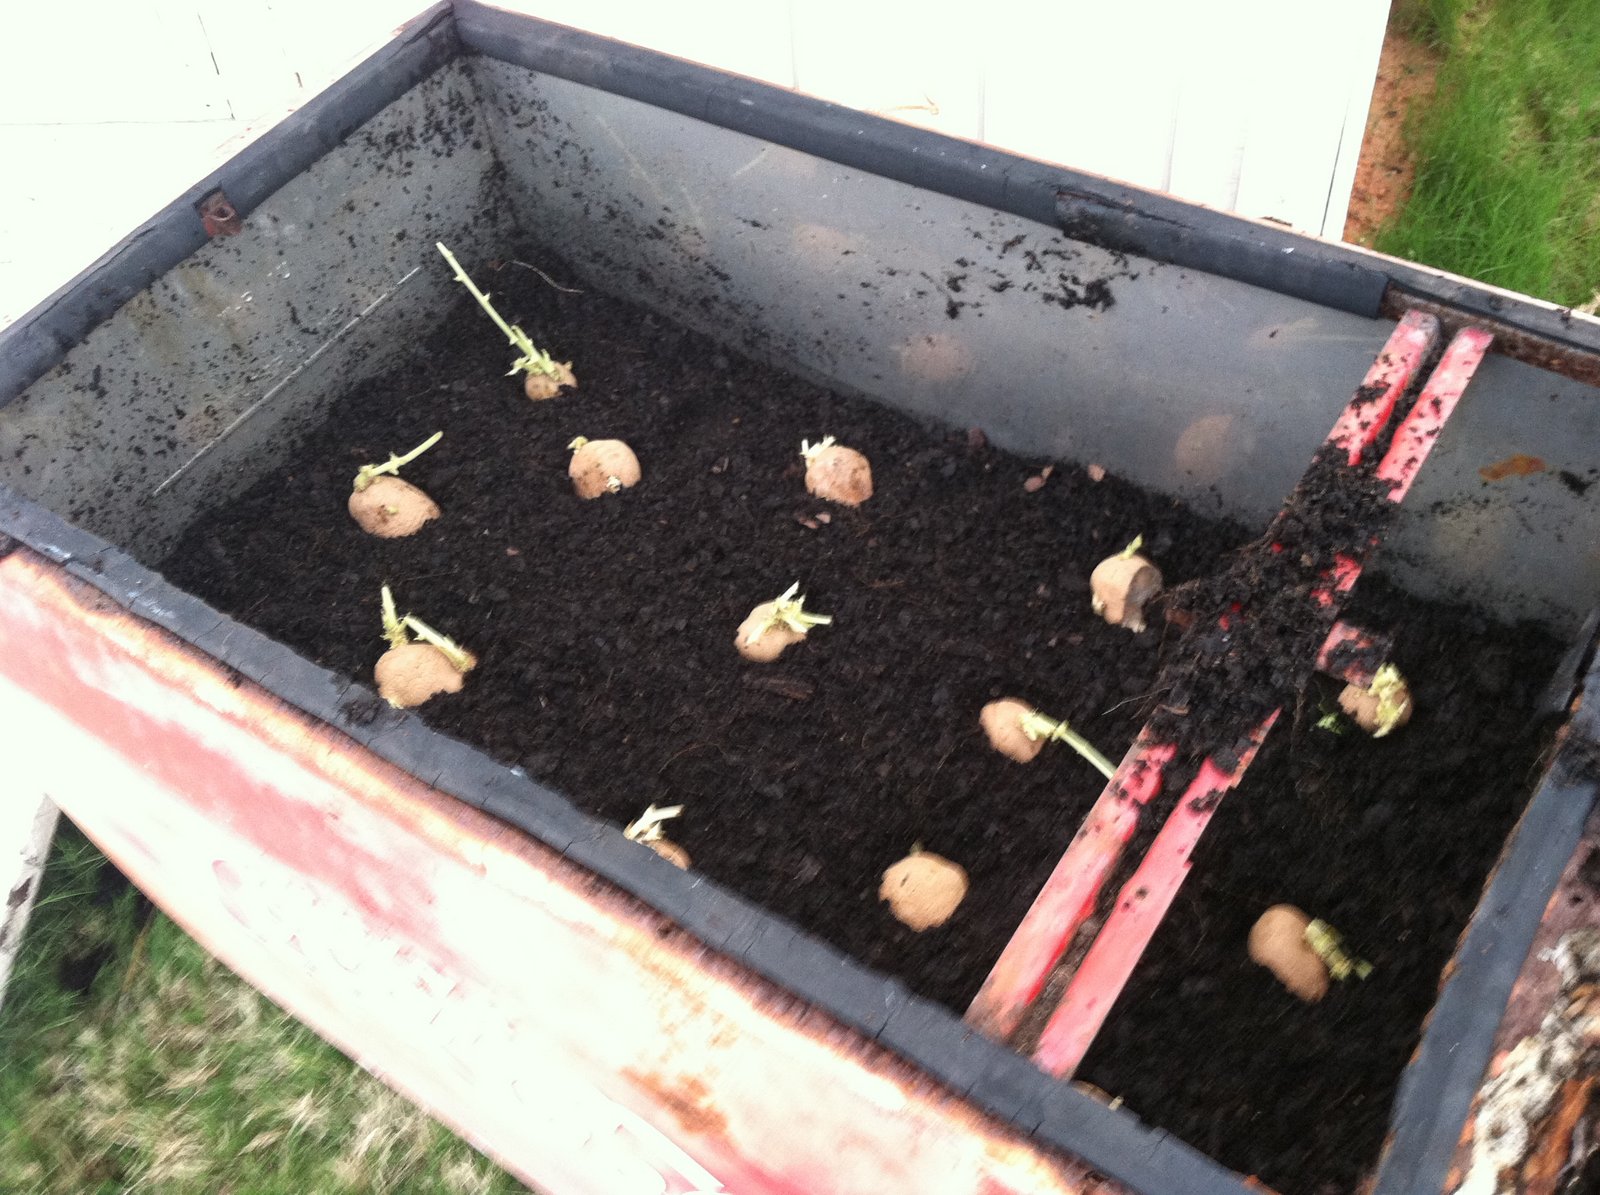
I am excited this year about growing potatoes. I have never grown them before and after seeing fellow bloggers harvests, I have made it a priority to try them this year. I am running out of garden space in my raised beds so I decided to plant my potatoes in my Coca Cola cooler planter box. Last year I planted peppers in this box, and here is that post.
I wanted to plant red potatoes, but the local nursery only had Kennebec seed potatoes so I had to work with what they had. I really hope I get some good potatoes.
Here is the cooler box positioned in front of my little storage shed.

I started by cutting the potatoes into chunks with several sprouts per piece. I waited two days for them to brown over before planting at the advice of the nursery owner.

The cooler had decent soil, and it was filled to the top. I shoveled out all the dirt except for 5 to 6 inches of soil. I spread out the pieces in the cooler, they are spaced 8 to 10 inches apart. I know that is a little too close, but I wanted to use as many pieces as possible.

I added an additional layer of soil covering the potatoes. I have read that as the sprouts grow up, you add additional soil around them until your planter is filled to the top with soil. We will see what happens.

I am excited this year about growing potatoes. I have never grown them before and after seeing fellow bloggers harvests, I have made it a priority to try them this year. I am running out of garden space in my raised beds so I decided to plant my potatoes in my Coca Cola cooler planter box. Last year I planted peppers in this box, and here is that post.
I wanted to plant red potatoes, but the local nursery only had Kennebec seed potatoes so I had to work with what they had. I really hope I get some good potatoes.
Here is the cooler box positioned in front of my little storage shed.

I started by cutting the potatoes into chunks with several sprouts per piece. I waited two days for them to brown over before planting at the advice of the nursery owner.

The cooler had decent soil, and it was filled to the top. I shoveled out all the dirt except for 5 to 6 inches of soil. I spread out the pieces in the cooler, they are spaced 8 to 10 inches apart. I know that is a little too close, but I wanted to use as many pieces as possible.
I added an additional layer of soil covering the potatoes. I have read that as the sprouts grow up, you add additional soil around them until your planter is filled to the top with soil. We will see what happens.

Saturday, April 27, 2013
Fence Project Done - What a difference!
Please visit and like my new facebook page
Georgia Home Garden.
The fence project is done and I am so glad I decided to expand our back yard into the side yard. My back yard feels huge now, and my mind is running wild with new projects I can do. Me and the oldest daughter have already been playing baseball, and I have some ideas on adding some more garden areas in the future.
I have taken a lot of pictures, but here are some good ones.
View of the back fence wall. This section had to face me due to a neighbors existing fence.

The old fence came off the corner of my house and followed that orange dirt. I used the dirt they dug up for the posts and filled in a huge low spot. The new fence comes off the house 20 feet, and this is a view of the additional backyard space.

Nice picture showing fence detail.

I had a small walk through gate added so I can get to my garden from the back yard. Notice the 6x6 post used for hinge side of gate.

View from the garden.

Great view from the street looking toward my house, I can't wait for the Nuttall Oaks I planted last fall to grow and fill in this area.

This is the section of fence that is double sided. Notice how straight the pickets are and you can't even see that there are pickets on both sides. This fence installer used string lines for everything, and he used a level on every picket for this double sided section. A true craftsman.

Standing in old "side yard" which is now back yard.

View from driveway looking toward side yard. The distance from the new fence and street is 22 feet, which is still plenty of room so the fence is not too obtrusive.

I added some landscaping between the new fence and the driveway to dress up this area. More on that in another post.

View from driveway toward main gate.

Fence Project Update - End of Day 2
Please visit and like my new facebook page
Georgia Home Garden.
At the end of day two, and the fence is starting to take shape. They have finished setting posts and are putting up most of the side rails.
View from garden, I like the fact that they are using three side rails: top, bottom, and middle. I have seen fences where the installer only uses a top and bottom rail.

One section of the fence includes rails on both sides. I am installing the fence the "proper way" by putting the good side toward the street and my neighbors view. On the back section of the fence, the installer could not do the good side facing neighbor because they have a fence there already. So that section will have the good side towards me. I didn't want my neighbor to have the posts facing their view, so I did what was right and paid extra to have rails and boards installed on both sides of the posts. It cost me an extra 300 dollars to do that, but I think it is worth it to do it right.

You can see the neighbor's fence in the background and how my fence extends past that. It is that extension that is double sided.

Another view.

View from my driveway, they should start putting the pickets up tomorrow.

Wednesday, April 24, 2013
Fence Project Update - End of Day 1
Please visit and like my new facebook page
Georgia Home Garden.
The fence project is off to a great start. So far I am really pleased with the quality of work being done by this company. I have been taking a lot of pictures and here are the highlights from day one.
The first step was they measured off approximately where each post would go based on the string line I had set for them. They dropped a post and a bag of concrete at each mark.

Another view from the driveway, gorgeous Spring day.

Now the fun part, they started digging each hole by hand.

Each hole was approximately 2 feet deep.

After they had an entire set of holes dug, they dropped in the posts.

They started by plumbing each corner post first, and then tied a string to each corner post. This string line was used to plumb the additional line posts in a perfect line.

How do I know it is a perfect line? Because it looks like one post from this angle straight on.

I stepped to the side and snapped a picture and you could see all the posts on this side have been set.

Another angle looking toward the driveway, next step, putting up rails.

Subscribe to:
Posts (Atom)