Showing posts with label Projects. Show all posts

Monday, May 21, 2012

New Flower Beds - Part 2

Please visit and like my new facebook page Georgia Home Garden.

In part 1 I posted about my first bed that I created after my sod project.  This post is about my next bed project.  This one is bigger than the previous and took a little more work. 

This bed has my autumn blaze red maple tree as an anchoring point.  The tree is located a few feet off a rock wall that separates my lawn from my garden area.  I planted three more red double knockout roses behind the tree and a few feet off the wall.  I then moved a three piece bird bath in the center of the bed and planted red begonias encircling around the bird bath.  I am starting to get bit by the landscaping bug and I am looking for other projects to work on.

Here is the bed after I laid my sod

Here is a front shot of the bed after I planted the roses,
moved the bird bath, and mulched with straw.
 

Here is a side shot along the rock wall.
 

Here is a kid's play scoop I found while digging for the roses. This is the third time since I have lived in the house that I have found toy artifacts from previous owners.  I always think it is cool to imagine a young child similar to my daughter's age playing in the dirt 40 years ago.

Here is the bird bath after I planted the red begonias around it.  This bird bath is made up of three pieces with three sea horses forming the bottom base, a shell forms the top, and a praying angel rests on top.  This is a very special item because it was my grandmothers for many years and she let me have it.  It is very heavy and has to be at least 50 years old.  I love the weathered look it has.

Finished bed after planting begonias.

Front shot of finished bed.  In a few years the roses 
should grow to 3-4 feet and fill in the back wall.

Sunday, May 20, 2012

New Flower Beds - Part 1

Please visit and like my new facebook page Georgia Home Garden.

When I laid my new sod a few weeks ago, I intentionally didn't sod some areas that I intended to turn into landscape beds.  I don't have very much experience or skill in landscape design, but I knew I wanted to plant some knockout roses.  I have been late to the knockout rose craze that has swept the county the last 10 years.  My thoughts were that I would plant some knockout roses with annuals and replace the annuals a few times a year to keep it fresh.  This post is the first of two beds I have created.

This first bed is in a corner of my yard where the fence meets together.  I wanted to plant one double knockout rose in the center and a row of white begonias lining the bed border.

Here is the knockout rose I planted.  This is a double knockout rose, which I learned is designed to make the blooms look more like the blooms of traditional roses.  I have always noticed that regular knock out blooms looked a little different then regular roses.  I was happy to find the double knockout.

Here is what I started with.  
I used the string tied to the fence post to mark an even curve. 

Next, I cut the sod and used the remnants to fill in the curve.

I used my tape measure to measure the distance
between the begonias around the curve.
My wife said I was being OCD, I said I was being precise.

Finished product with pine straw mulch.


Sunday, May 6, 2012

The Sod Project a.k.a. "Hell Week" - Part 3

Please visit and like my new facebook page Georgia Home Garden.

I detailed in part 1 the purpose behind this project and in part 2 the amount of prep work needed to prepare for it.  Finally after doing all the prep work I was ready to lay the sod.  Laying sod has to be one of the most back breaking jobs I have done.  The up and down, up and down, up and down makes it hard work.  This is the second time I have laid sod, the first was my front yard 10 years ago.  I can say that 10 years makes a difference on your body.

I had a total of four pallets of grass to lay down, and each pallet covers 500 sq. ft.  I also had the challenge of matching up the new grass to the existing grass.  I must have measured pretty well because I ran out of grass with just a little left to do.  I picked up 20 more squares at my local nursery to finish the job.  

Well I survived my own hell week.  It was so much work to get done in just a week, but I am happy that I did it.  My back held up pretty well, but my right knee has been sore for over a week.  I have been watering the grass every day for the last week and it is starting to green up nicely.  Hopefully over the next few weeks it will take root.

I started laying in the far end of my yard it was nice and cool that morning. 

I used a small hatchet to trim the sod nice and tight to the rock wall.  
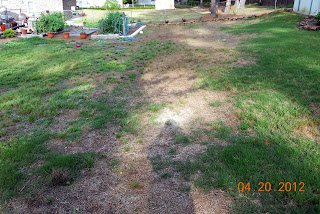
It worked well.

Working my way up the hill.

I left two areas unsodded, this is one of them.  
I am going to plant some knockout roses and flowers here.
 

Here is what it looked like after all the pallets were laid. You can see the small area I had left.  You can also see the grass is yellow because this was laid last and was at the bottom of the pallet.

Here is that same area after a week of watering, much greener.

The hill is still there, but so much better than before.

I used black garden soil to blend the old grass to the new.
This should grow together and disappear.

Same area after a week of watering.

A view from the garden looking out.

Opposite side, looking towards the garden.


Thursday, May 3, 2012

The Sod Project a.k.a. "Hell Week" - Part 2

Please visit and like my new facebook page Georgia Home Garden.

I detailed in part 1 of this project the purpose behind this huge undertaking.  The main reason of attempting something so labor intensive was the cost savings.  In this post I am going to detail what all I had to do before I could lay the sod.

As I mentioned in part 1, the first task was to scrape and dig the entire yard by hand.  When I first started I was just using a simple garden hoe and it worked great because it was just dead grass roots on top of dirt.  I had to eventually get on my hands and knees and use a shovel to undercut the remaining St. Augustine grass and live weeds.  This is a picture of the mess.  That little patch of green near the tree was live St. Augustine and that was the worst part to dig by hand.

The next step after digging the majority of the yard was to tackle the mountain leading up to my shed.  This involved two steps.  Step one was I had 5 yards of fill dirt delivered and dumped on the hill.  The truck made huge ruts in my yard but I didn't care because it saved me a lot of work by dumping it where I needed it.  This fill dirt was primarily clay which packed well and I raked and shoveled it around until I got a pretty decent slope.  Step two was I had 5 yards of "top soil" delivered and dumped in my driveway.  I then used about a yard of top soil to top dress the fill dirt and prep the sod.  The rest of the top soil would be used as I laid sod to fill in any dips.  I wish I would have taken more pics of this process, but this was what it looked like after I was done.

I then realized after my first attempt that the grade was still too steep so I worked the hill some more and used a 10 ft 2x4 to screed the hill and smooth it out.  This was the final product.  It is really hard to appreciate how much better this looked from the picture, but it did.

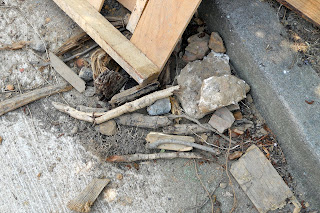
Now it is time for me to rant about the quality of my "top soil" that they delivered.  I specifically told the guy that I was using this to lay sod and I wanted the top soil to be good quality and not loaded with a bunch of debris.  "Oh yeah, sir you will love this stuff."  The stuff they call top soil today makes me laugh, it is basically fill dirt but without the huge clay clods.  I had all kinds of rocks, wire, wood, sticks, etc.

This is just of little bit of what I found in the "top soil".   How come when I watch Yard Crashers and they bring in a truck load of top soil it is always dark black and looks like a truck load of Miracle Gro garden soil?  Because it is TV that is why and not reality. 

So here is what it looked like when the sod arrived.  As you can see I still had a good bit of weeds to dig up near the house.  I just decided to do it as I went because I ran out of time.

This part of the back yard looked a lot better and I had it pretty much ready to go.  The company that delivered the sod dropped the pallets exactly where I wanted them.  That saved me some work.  The lighter dirt in the picture is the top soil I used to smooth out the grade. 

In part 3 I will detail the task of laying the sod and bringing it all together

Tuesday, May 1, 2012

The Sod Project a.k.a. "Hell Week" - Part 1

Please visit and like my new facebook page Georgia Home Garden.

I am going to detail this project in several posts because there is a lot of history with me and my back yard grass.  It has been 12 years of a love hate relationship.  My backyard has St. Augustine grass and I have never quite been able to figure out how to properly care for it.  It seems like I always have issues with dead spots and it is just finicky grass.

I don't know what happened within the last year but it is completely dead and gone.  The weeds have taken over and I have a mess.  I decided that I have had enough and I am going to resod the whole backyard in Bermuda grass, Tifton 419 to be exact.

I also have this huge hill leading up to my small tool shed.  This hill is like 60 to 75 degrees steep.  It has always been a pain to mow and just to climb up it is a chore much less push my mower into the shed.  In addition to resodding the yard, I want to make this hill less prominent.

I resodded my front yard exactly 10 years ago and I had a guy who did some grading for me.  I gave him a call to see what he would charge to level out the hill, scrape everything smooth and prep it for me to lay sod.  His quote was that it would cost me between $2500 to $3000 dollars by the time I paid his fee, paid for the amount of dirt to level off the hill, and pay for the sod.  That was probably a fair estimate, but I didn't want to pay near that amount of money.

So with that, I have decided to tackle the whole project myself.  The plan is to dig up the entire yard by hand, haul in dirt to level out the hill, and lay the sod.  The wife was not happy about this new project given the fact that we have a newborn but I reasoned that now is the time before the weather gets really hot.  I also promised her I could do the whole thing in 7 days.  And so Hell Week begins....


Here is my yard in 2010, look how nice the St. Augustine looks.  
It isn't perfect, but it looked pretty dang good.

Now this is last year, you can see it isn't quite as lush and green.

Now it is almost 85% dirt and weeds, most of the green is weeds.
You can see steepness of hill in top right leading to the shed. 

Thursday, April 19, 2012

Coca Cola Cooler Pepper Planter Box

Please visit and like my new facebook page Georgia Home Garden.

Last July I posted about a Coca Cola cooler box that I picked up at a neighbor's yard sale.  For the last nine months it has sat on my back porch.  I did not have the energy to fool with setting it up in the heat of summer.

I have known for a few months that I was going to plant hot peppers in it this year, specifically jalapeno and habanero peppers.  I started both from seed this year and they were ready for their new home.  I can't wait to see them grow in the cooler, and I think it is going to be an awesome addition to my gravel patio.

I decided to put the cooler on my gravel patio directly between two tiki torches.  I built the gravel patio last year after building my garden area.  I have never blogged about it, but we really like it.  It contains a swing, firepit with chairs, cedar logs used for end tables around the firepit, and a picnic table.  It has a pea gravel base with concrete stepping stones.  We love to sit out in the swing that faces the garden and the tiki torches.  This cooler is going to look so cool there.

Here is the cooler after I positioned it in place.

The interior is stainless steel and will never rust.  
It also has a drain so the dirt should drain well.

Here is what it looked like after I filled it with good garden soil

I planted 10 plants, five jalapenos and five habaneros.  They are spaced about a foot apart which is a little closer than recommended, but should be ok.

Here is everything all planted and ready to go.

Another angle, I like that one rusty corner, it makes it authentic looking to me.

One of the habanero plants is already forming flowers.

Saturday, March 10, 2012

Garden Expansion Project - Part 2

Please visit and like my new facebook page Georgia Home Garden.

Today is the kind of day every gardener dreams of.  There was a clear blue sky and just a slight breeze.  It was sunny and about 65 to 70 degrees.  The perfect day to finish up my garden expansion project.  I went to Home Depot this morning and rented a mid size rear tine tiller.  I wasn't sure how long it would take me to till up the 400 square foot area.  I rented it for four hours, and that was a smart move.  The dirt up there is pretty decent compared to the Georgia clay in most of my yard.

After getting my neighbor to help me unload the tiller and get it in position, I was done in less than an hour.  I tilled the area for another hour until everything was tilled nicely.  Baby powder consistency, oh yeah!  I hit a few roots from the tree I dug up, but nothing major.  I was pretty surprised how easy it was.  I raked everything smooth and now I am ready to get some corn and peas in the ground. 

Here is the beast, cost me about 45 bucks for 4 hours.

Here is the area after the initial tilling of one hour.

This was a nice cinder block and concrete footer that came from something.  The tiller practically jumped out of my hands when it hit this.

Here are the roots I found that I missed when I dug out the tree stump.  There weren't that many.

Here is the area after tilling for another hour, it was perfect.

Here is the area after I raked it smooth.

Sunday, March 4, 2012

Garden Expansion Project - Part 1

Please visit and like my new facebook page Georgia Home Garden.

The expansion of my upper gardening area has been a gradual work in process for the past nine months.  This area will give me 16 x 25 feet of gardening area for a total of 400 sq feet.  I will mostly plant field peas and corn up here.

In May of last year I cut down a 25 to 30 ft October Glory red maple tree that was shading the area, details here.  Then in January of this year, I removed the stump and most of the roots that were left, details here and here.

So here we are in March, and just a few weeks before I can start planting some of my favorites.  So today after church I had to get it in gear to finish my expansion.  All that is left to do is to till the entire area and put a border around it using bricks.  I got the border done in a few hours and tried to get everything as clean as I could.  I am going to rent a tiller next week and till the entire area. 

This is the existing area and you can see the four foot strip that I was using outlined by bricks.  Weeds were bad in a few spots.

First thing I did was measure down 16 feet from the fence line at both ends and drove a metal garden stake in the ground.  I tied a string to each stake to give me a straight line to lay my bricks.  I raked the area to get it as smooth as I could.  I am not going for perfection here, and I just dry laid the bricks to segregate the area that I will be gardening in.

This was how it looked after the first row of bricks were laid.  Looks straight enough for me.

This was after the second row of bricks.  Now all that is left is to till everything up.